Python - How to Install a Python App in a Virtual Environment on Mac
Theodoros Kafantaris
Published on September 18, 2024
Step 1: Install pip
pip is the official Python package installer, which allows you to install and manage Python libraries and packages. In most cases, Python 3 comes with pip pre-installed on macOS. You can check if pip is installed by running the following command in your terminal:
pip --version
If pip is installed, this will return the version number. If not, and you encounter an error like "pip command not found", you can install pip using the following command:
sudo easy_install pip
This will install pip on your system.
Step 2: Install virtualenv
virtualenv is a powerful tool used to create isolated Python environments for projects. It ensures that each project can have its own dependencies, regardless of what’s installed globally on your system. This is particularly helpful when managing multiple Python projects with different dependencies or Python versions.
To install virtualenv, run:
sudo pip install virtualenv
If you encounter any permission issues or errors, you can use:
sudo -H pip install virtualenv
The -H flag sets the home environment for the sudo command, avoiding potential permission conflicts during the installation process.
Step 3: Create and Start a Virtual Environment
Now that you have virtualenv installed, let's create a virtual environment for your project.
Create a project directory where you want to store your code:
mkdir my_project && cd my_project.
Create a new virtual environment inside the project folder:
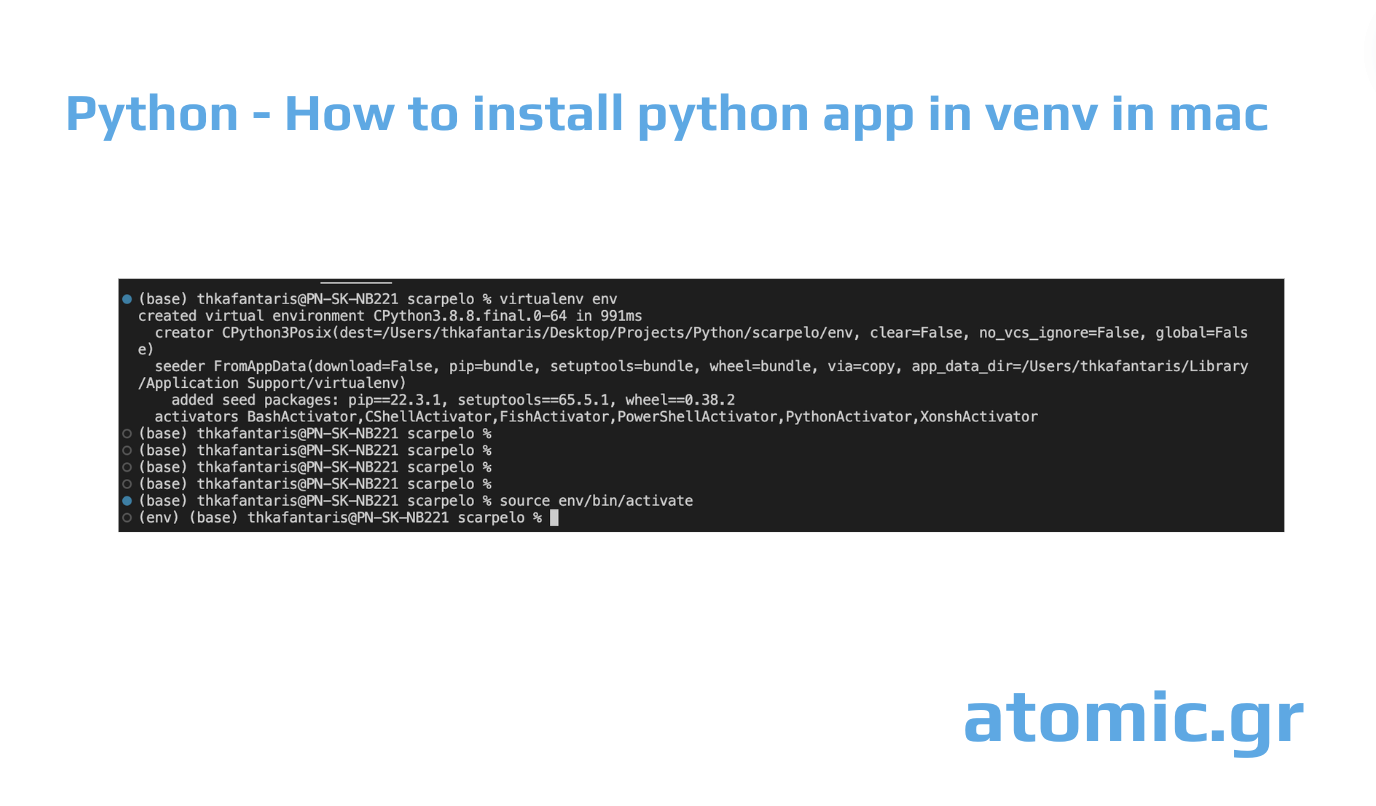
virtualenv env
This creates a new folder named env that contains the isolated Python environment.
Step 4: Activate the Virtual Environment
To start working inside the virtual environment, you need to activate it:
source env/bin/activate
Once activated, you’ll notice that your terminal prompt will change to show the name of the virtual environment (in this case, env). This indicates that you are now inside the virtual environment, and any Python packages you install will be contained within this environment.
To deactivate the virtual environment later, simply run:
deactivate
Conclusion
Using virtualenv is essential for managing Python projects on macOS, especially when juggling multiple projects with different dependencies. By following the steps outlined above, you'll be able to set up and manage isolated Python environments easily.


